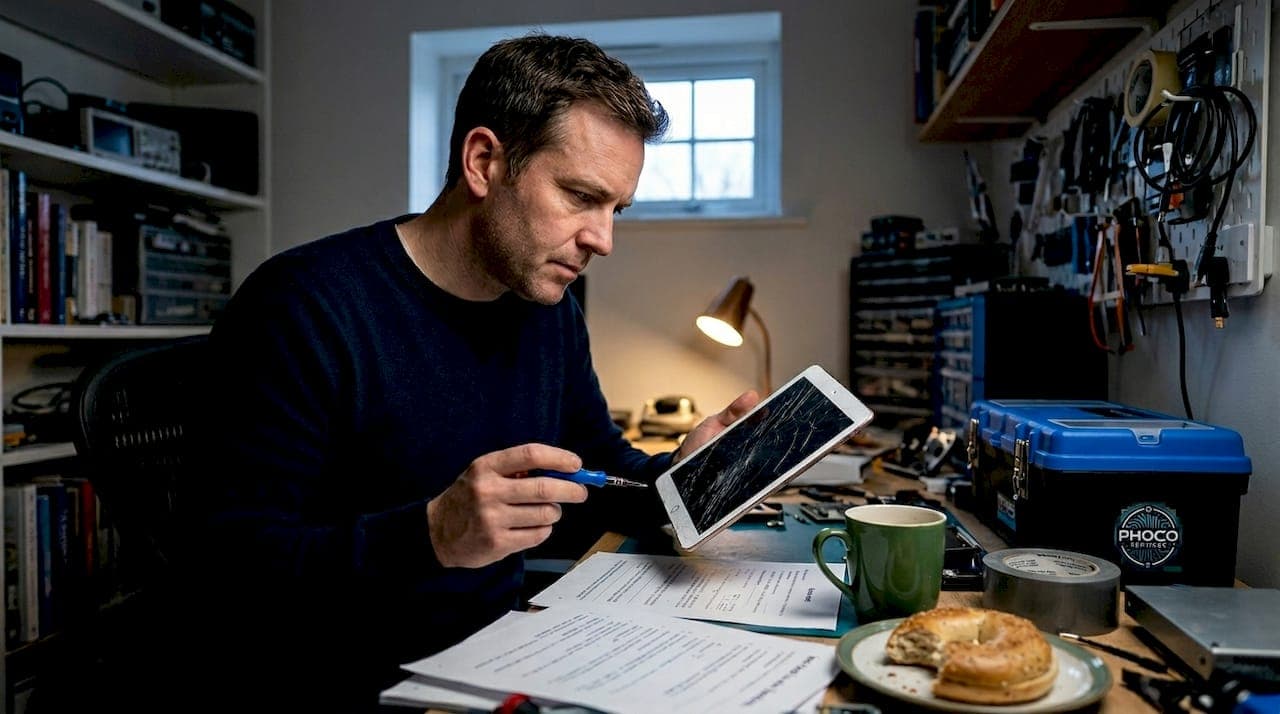
A cracked tablet screen can stop a student's school day cold. Whether it happened in a backpack, during lunch, or after sliding off a desk, the result is the same: a device that's hard to read, painful to touch, and potentially unsafe to use. Knowing how to repair cracked student tablet screen damage quickly and affordably can mean the difference between missing assignments and staying on track. This guide covers everything from assessing the damage to deciding between DIY repair and professional service, so you and your student can make the right call without wasting time or money.
Table of Contents
- Key takeaways
- How to repair cracked student tablet screen damage: assess first
- Tools, materials, and safety before you start
- Step-by-step guide to replacing a cracked tablet screen
- Troubleshooting and maintaining your tablet after repair
- My take on DIY vs. professional repair for student tablets
- Get your student's tablet repaired fast with Phocoservice
- FAQ
Key takeaways
| Point | Details |
|---|---|
| Assess damage type first | Identify whether the glass, digitizer, or LCD is damaged before deciding on a repair path. |
| Know the 50% repair rule | If repair costs exceed half the tablet's replacement value, buying a new device usually makes more sense. |
| DIY requires the right tools | Successful screen repair depends on having proper tools and knowing your tablet's screen type before starting. |
| Professional repair offers warranty | Certified technicians provide diagnostics, calibration, and warranty coverage that DIY repairs cannot match. |
| Prevention saves money long term | Screen protectors and protective cases significantly reduce the risk of future screen damage. |
How to repair cracked student tablet screen damage: assess first
Before you order parts or reach for a screwdriver, you need to know exactly what you are dealing with. Not all cracks are equal, and the type of damage determines whether a repair is practical or whether replacement makes more sense.
There are three main damage categories to understand:
- Glass only: The outer glass is cracked, but the display works normally with full touch response. This is the best-case scenario and the least expensive to fix.
- Digitizer failure: The touch layer beneath the glass is damaged. The screen may display fine, but touch input is unresponsive or erratic in certain areas.
- LCD damage: The liquid crystal display itself is broken. You will see black spots, color bleeding, white patches, or a completely dark screen. This is the most expensive type to repair.
Beyond the visual crack, watch for warning signs that point to internal damage. Flickering, heat, or discoloration around the crack area can indicate internal electrical faults and potential battery hazards. If the tablet feels warm near the crack or the display flickers unpredictably, stop using it and seek professional help immediately.
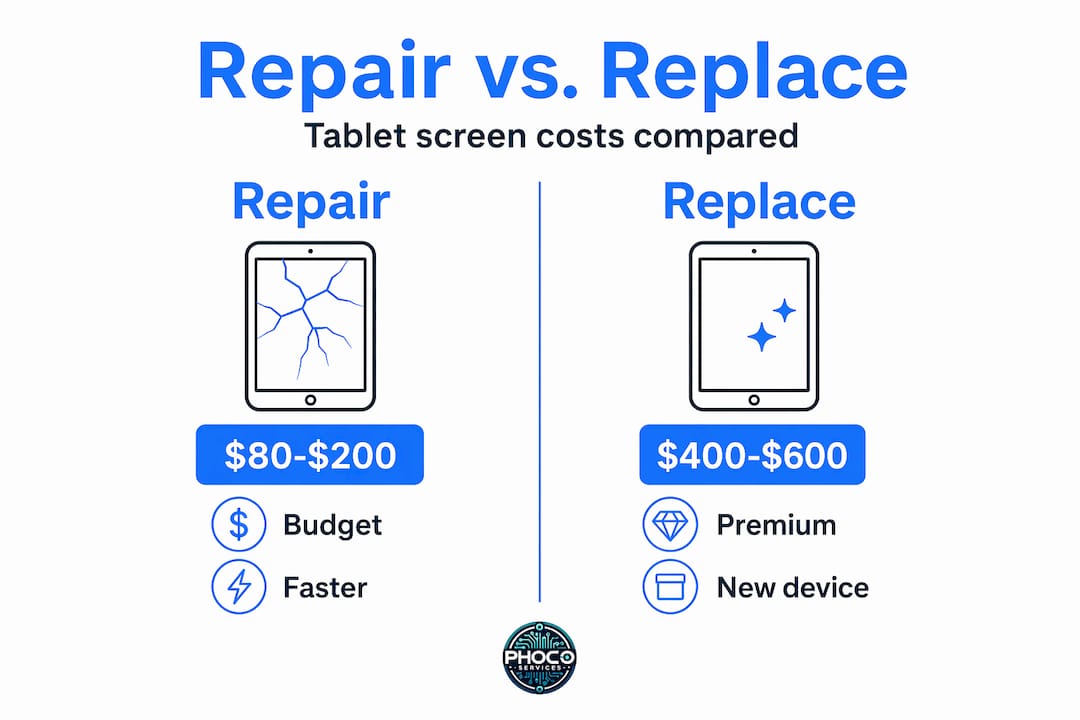
The financial side matters too. Professional tablet screen repair costs range from about $80 to $600 depending on the tablet model and damage severity. Budget tablets typically fall in the $80 to $200 range, while premium devices like iPad Pro or Samsung Galaxy Tab S models can run $400 to $600. A practical rule: if repair costs exceed 50% of what a replacement device costs, buying new is usually the smarter financial decision. This is especially true for tablets that are more than three years old or no longer receiving software updates.
Safety is another factor that does not get enough attention. Small cracks worsen over time, allowing moisture to enter and cause internal corrosion. A cracked screen also exposes sharp glass edges that can cut fingers during normal use. Do not let a student continue using a severely cracked device just because it still powers on.
Tools, materials, and safety before you start
Preparation separates a successful repair from an expensive mistake. Whether you are attempting a DIY fix or simply want to understand what a technician will do, knowing the required tools and safety steps is critical.
Here is what a proper tablet screen repair toolkit looks like:
| Tool | Purpose |
|---|---|
| Heat gun or hair dryer | Softens adhesive holding the screen assembly |
| Plastic spudger or opening picks | Pries screen edges without scratching or damaging the frame |
| Phillips and pentalobe screwdrivers | Removes internal screws specific to the tablet model |
| Tweezers | Handles small connectors and cables safely |
| UV or B-7000 adhesive | Reseals the screen after replacement |
| Magnifying glass or loupe | Helps see small flex cable connectors clearly |
One detail that catches many people off guard is screen type. Tablet screens are either laminated or non-laminated. Laminated screens fuse the glass and display into one unit, which means you must replace the entire assembly if anything breaks. Non-laminated screens have a gap between layers, allowing glass-only replacement if the LCD and digitizer are undamaged. Knowing which type your tablet has before ordering parts saves both time and money.
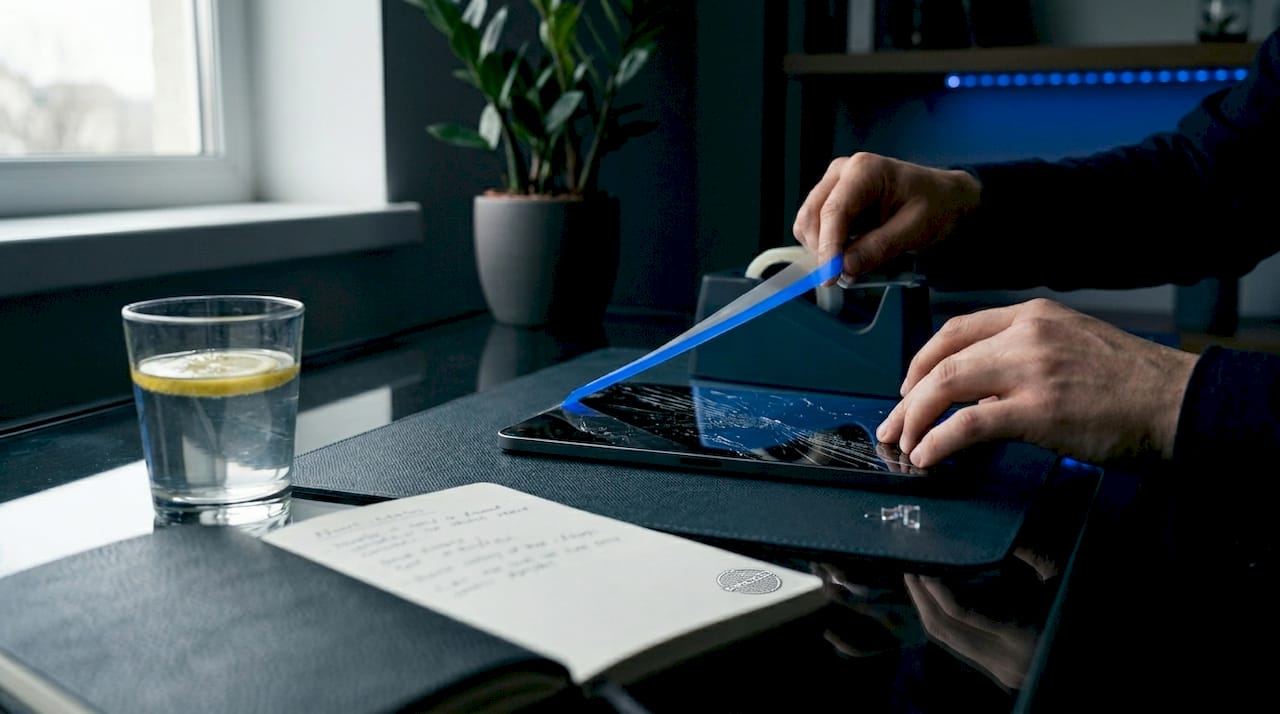
For temporary protection before repair, clear heavy-duty tape can hold shattered glass in place. Never use standard glue or adhesive on a cracked screen. Improper adhesives can cause permanent damage and make professional repair more difficult and costly later.
Pro Tip: Always disconnect the battery before touching any internal components. Even with the tablet powered off, residual charge in the battery can damage circuits or cause a short if a metal tool contacts the wrong component.
Step-by-step guide to replacing a cracked tablet screen
This process applies to most Android tablets and iPads with non-laminated screens. If your device has a laminated screen, the steps are similar but the entire display assembly must be replaced as one unit.
- Power off the tablet completely. Hold the power button and confirm shutdown. Do not just put it to sleep.
- Apply gentle heat to the screen edges. Use a heat gun on a low setting or a hair dryer held about four inches from the surface. Move it slowly around the perimeter for 60 to 90 seconds. This softens the adhesive without damaging internal components.
- Insert a plastic opening pick at a corner. Slide it carefully along the edge to separate the glass from the frame. Work slowly. Forcing the pick can snap the frame or damage the digitizer cable running along the side.
- Lift the screen assembly carefully. Do not pull it all the way off. The digitizer and display cables are still connected underneath. Prop the screen up at a 45-degree angle using a small object.
- Disconnect the battery connector first. Use a plastic spudger to gently pop the battery cable off its socket before touching any screen cables.
- Detach the screen cables. Flex cables are rated for only a few connect and disconnect cycles, so handle them with care. Use tweezers or a spudger, never metal tools, and avoid bending the cables at sharp angles.
- Connect the new screen assembly. Press each cable connector firmly until it clicks into place. A loose connection causes touch failure or display issues after reassembly.
- Test before sealing. Power on the tablet and test every area of the touchscreen. Swipe across all four corners, type a few characters, and check the display for dead zones or color issues.
Testing touch functionality before applying adhesive is the single most important step most DIYers skip. Sealing the screen before confirming it works means you will have to open it again, and flex cables tolerate very few cycles before they fail permanently.
- Apply adhesive and reseal. Run a thin bead of B-7000 or UV adhesive along the frame. Press the screen down firmly and apply uniform adhesive pressure using rubber bands or a soft weight across the surface. Avoid clamps, which create uneven pressure and cause screen lifting at the edges.
- Allow full curing time. Most adhesives need 24 hours to cure completely. Avoid heavy use during this period.
Pro Tip: Take photos of every cable and connector before you disconnect anything. A quick photo with your phone gives you a clear reference map when it is time to reconnect everything.
Troubleshooting and maintaining your tablet after repair
A successful repair does not always mean everything works perfectly on the first try. Here is what to look for and how to handle it.
- Touch not responding in certain areas: This usually means a cable is not fully seated. Open the device and firmly press the digitizer connector down until it clicks. Do not assume it is connected just because it looks in place.
- Display shows lines or color patches: This points to a damaged LCD or a pinched display cable. If the new screen arrived damaged, contact the supplier. If the cable was bent during installation, you may need a replacement cable.
- Screen lifting at the edges: The adhesive did not bond properly. Apply gentle heat to that section and press firmly with a flat object for several minutes. If it lifts again, reopen and reapply adhesive.
- Tablet overheating after repair: A pinched or improperly seated battery connector can cause heat buildup. Power off immediately and check the battery cable connection.
For ongoing protection, a tempered glass screen protector is one of the best investments a student or parent can make. A good protector absorbs impact and prevents the kind of surface crack that starts small and spreads. Pair it with a case that has raised edges around the screen so the glass never makes direct contact with a flat surface when the tablet is set face-down. Professional repair shops also check battery health and camera alignment during service, which is worth considering if the device took a hard impact.
If touch issues or display problems persist after two attempts at adjustment, stop. Continued disassembly increases the risk of damaging the motherboard or breaking a cable beyond repair. That is the point where professional service becomes the right call.
My take on DIY vs. professional repair for student tablets
I have seen both sides of this equation play out dozens of times. DIY tablet screen repair can absolutely work, and for a budget tablet worth $100 or less, spending $25 on a replacement screen and an afternoon on the repair makes real financial sense. The satisfaction of fixing it yourself is real too.
But I have also seen parents spend three hours on a repair, damage a flex cable in the process, and end up paying more for professional service than they would have if they had just brought the device in from the start. The risk is not the repair itself. The risk is underestimating how unforgiving these components are.
My honest advice: if the tablet is a premium device, if it is less than two years old, or if the student depends on it daily for school, go professional. Professional repair services include warranty coverage on parts and labor, which DIY simply cannot offer. The cost difference between a $150 professional repair and a $50 DIY attempt is not worth a failed flex cable on a device a student needs for class tomorrow.
For older or lower-value tablets, DIY is a reasonable option if you are patient, methodical, and willing to test thoroughly before sealing. Just do not rush it.
— Michael
Get your student's tablet repaired fast with Phocoservice
When a student's tablet is out of commission, every day matters. Phocoservice offers same-day tablet repair with certified technicians who have over 15 years of experience handling screens, digitizers, and display assemblies across a wide range of tablet models. Every repair comes backed by a one-year warranty on parts and labor, so you are not gambling on the fix holding up through a full school year.
Phocoservice serves students and families across Lawton, with convenient locations also covering Duncan, Cache, Elgin, and Frederick. Transparent pricing means you know the cost before any work begins. Reach out today for a free assessment and get that tablet back in your student's hands without the wait.
FAQ
How much does student tablet screen repair cost?
Tablet screen repair typically ranges from $80 to $200 for budget models and $400 to $600 for premium tablets like iPad Pro or Samsung Galaxy Tab S. The exact cost depends on the tablet model and the extent of the damage.
Is it worth repairing a cracked tablet screen or buying a new one?
Repair makes sense when the cost stays below 50% of the tablet's replacement value and the device is under two years old. For older tablets or severe damage, replacement is often the better financial choice.
Can I temporarily use a tablet with a cracked screen?
You can use it briefly with clear heavy-duty tape over the crack, but small cracks worsen over time and allow moisture to enter, which can cause internal corrosion and safety risks. Get it repaired as soon as possible.
What is the difference between a laminated and non-laminated tablet screen?
Laminated screens fuse the glass and display into one unit, requiring full assembly replacement. Non-laminated screens have separate layers, sometimes allowing a less expensive glass-only repair if the display and digitizer are still intact.
How long does a professional tablet screen repair take?
Most professional tablet screen repairs are completed the same day, often within a few hours. Phocoservice specializes in same-day tablet repair in Lawton, OK, so students are not left without their device for days at a time.